The Story
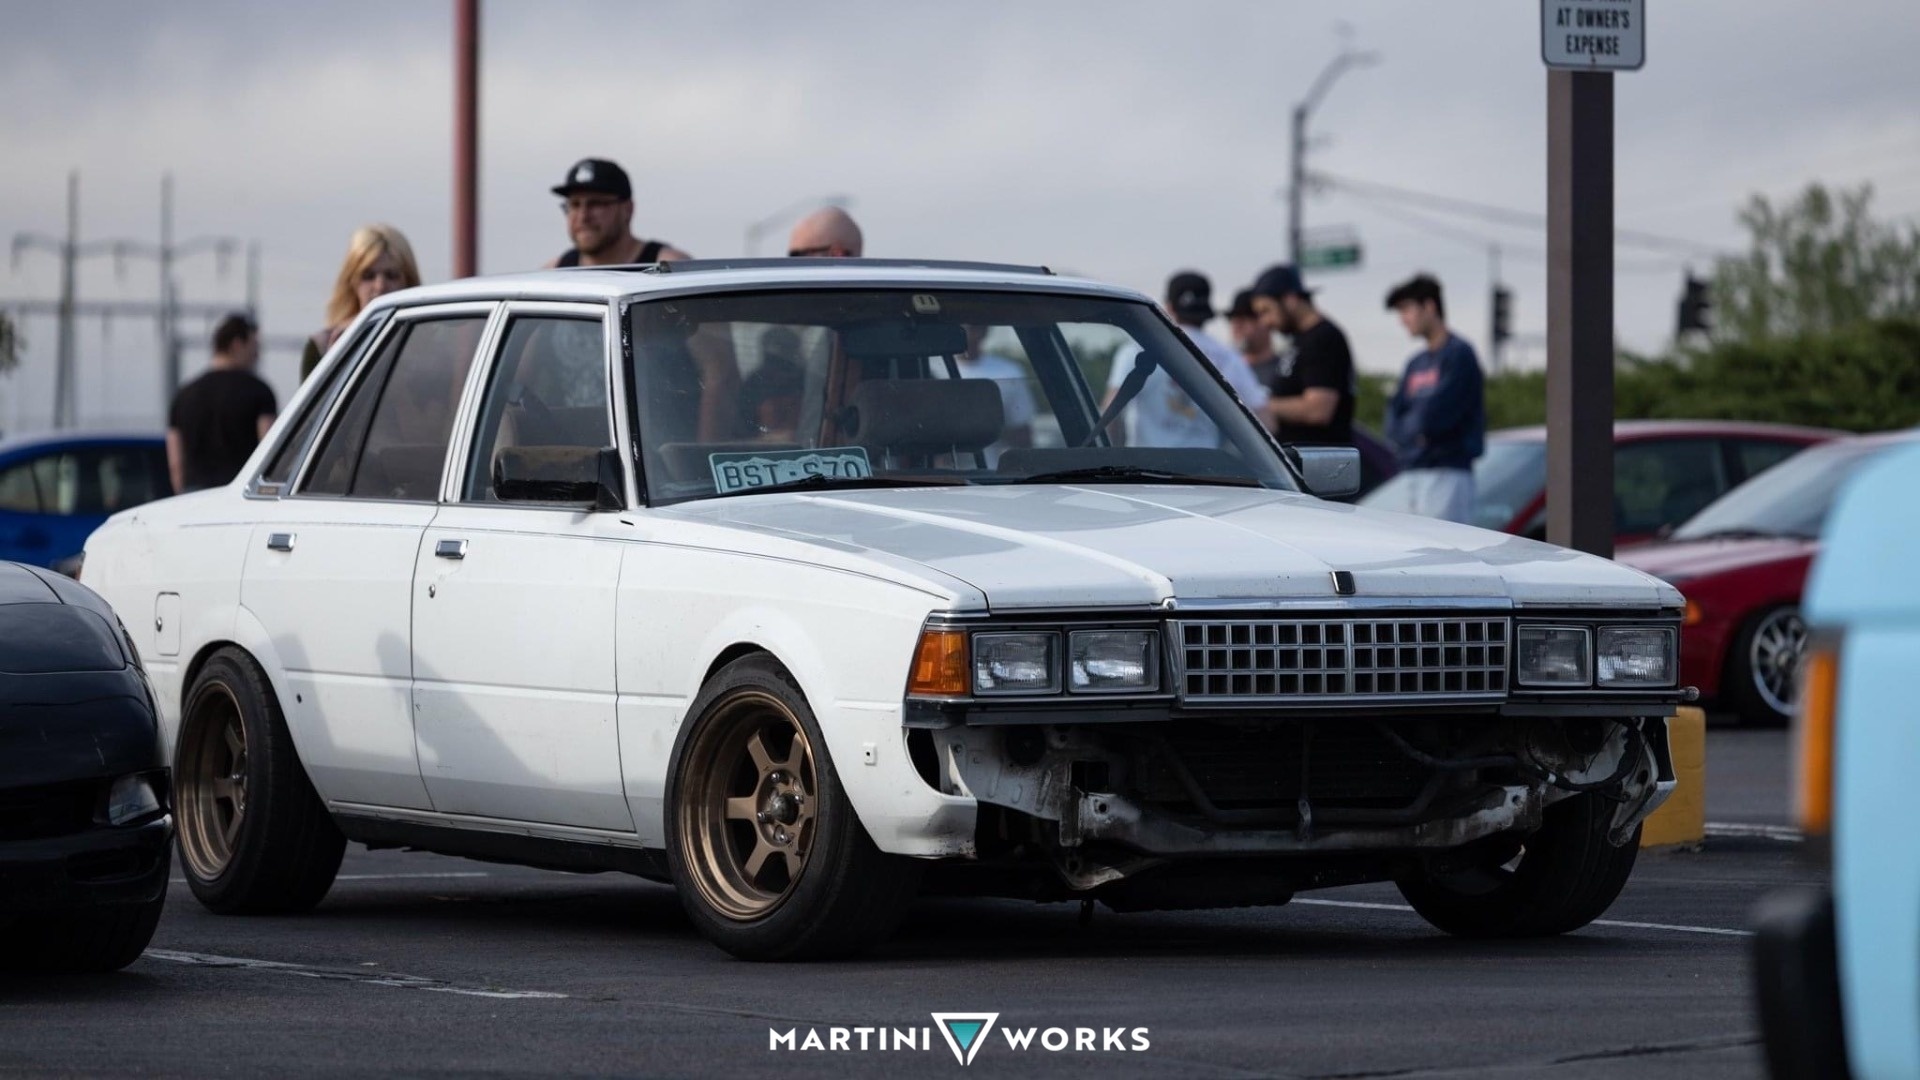
In 2021 I decided to finally get around to chasing my dream of drifting. So I started looking for the cheapest/easiest car I could get just to learn some drifting basics. Any one else that was shopping for a car around this time knows how insanely inflated the prices on everything was and this was no less true for shitting driftable cars. I eventually settled on paying 2k for a 1984 Toyota Cressida, which came with most of the parts I needed for a manual swap. The engine started and ran fine but the auto trans was completely blown. It seemed like a good deal considering the prices I had seen w58s being sold for so I drug the old Toyota onto a trailer and brought it home. Only three days after dumping the car in my garage I had the manual in and the car was finally cruising the streets again after years of neglect.
The next part was all fun and games, coil overs, wheels, tires, weld the diff, and get an alignment. Of course I was taking care of all the regular maintenance since I didn’t know the history of the car, just that at the very least, it had been sitting with a blown trans for at least a couple of years judging from the tags dating back to 2016 IIRC. On the drive back from my last self imposed requirement for a drift ready car, an alignment, I found out that the 5mge does not have a rev limiter (or mine didn’t work). Knock, knock. Who’s there? The rod bearing…
I found myself at a cross roads. With the 5mge needing a rebuild, I either needed to shell out the ~1,500 bucks for a machine shop to nurse my poor motor back to health or replace the engine. At this point, having done all the preventative maintenance I knew how to do, I was not feeling very confident in the power plant this car came with. While venting my frustrations to a friend though, he suggested a third option; buy his friends 3uzfe and make it fit. After maybe 10 minutes of googling, and thinking about it for less time than that, I decided it was a fantastic plan. I picked up the 4.3 quad cam V8 from the guy for $300 (or $400 maybe I can’t remember) and began, unbeknownst to me, a long and difficult journey full of learning experiences, life lessons in automotive hardships and little victories that build my confidence in my own capabilities. From here on out I’ll spare you the half assed attempt at journalistic writing and lay out the build in two sections; The engine - The steering. The following will not be in chronological order, there was a lot of trial and even more error throughout this project so some things got redone a couple times.
The Engine
When I picked up the 3uz, the intake manifold had been left off for an undefined period, resulting in leaves, sticks and dirt sitting in the intake ports. This prompted me to rebuild the top end along with a full gasket set so in hopes I could finally own a car that doesn’t leak oil.
I used a Quantum Auto adapter kit to fit the engine and trans together, it came with everything I needed, including the clutch, seals and hydraulic lines. I upgraded my master clutch cylinder to one out of a 1980s Toyota Landcruiser since the kit uses an internal clutch release bearing that requires more fluid to operate. The cylinder bore is larger and requires the whole in the fire wall to be opened up a bit to fit, but the bolt wholes line up and the clutch line bolted in just fine. For engine mounts, I’m using Xcessive Manufacturing 1uz to x7 mounts since the 3uz and 1uz are the same on the outside and the x6 and x7 chassis are almost identical. The 3uz came with a mid-sump oil pan and was not going to work so I swapped over a 1uz front sump oil pan and pick up tube along with the 1uz oil filter neck since it moves it towards the front of the engine and out of the way of the cross member. I grabbed some 2uz exhaust manifolds since they hug the block more closely, giving me more room to fit the steering shaft. I kept the stock x6 radiator and poorly mounted some Toyota corolla electric fans to try to keep it cool. I made a shroud to make the best of the junk yard fans and so far, they mostly keep up. The engine did not come with an intake so I grabbed an Injen intake, which is way too expensive for just an aluminum tube but whatever. I reached out to Tim with Lextreme.com to reflash the ECU to delete the immobolizer, and rewrap my wiring harness and wire in a fuse box. This made it very simple for a guy like me to hook up the engine harness to the car.
The Steering
Unfortunately, X6 Cressidas come with pitman arm steering, like a truck, from the factory. This bulky set of levers and blocky steering gear box had absolutely no chance of fitting under the new V8 so I needed to do a steering rack swap. At this point, I should have done everything in my power to get my hands on an X7 front subframe and steering rack. I could not find one. I could find an AE86 subframe and steering rack and decided that I would just make that work instead. Terrible decision. To make my crossmember easier to work off of, I cut out the middle section of it and welded some rectangular tube between the two outside pieces. For the steering shaft, I ordered a steering shaft adapter from Xcessive Manufacturing. The 86 steering rack is very small for a full size sedan. The input shaft on the steering rack ended up sitting much closer to the center of the car than the exhaust manifolds or steering shaft U-joints, were able to accommodate, so I had to shift the steering rack towards the driver side by a little over an inch if I’m remembering right. One of the PS line fittings ran into the top of the rack and began interfering with the oil pan. I ended up mounting the trans mission as high as I could to try to make them fit together. This did all technically work, however, incredibly poorly as you could imagine. After driving my first drift event with this set up I attempted to connect the power steering lines hoping that power steering would at least mute the less than optimal steering feel. The aforementioned power steering fitting that had been slowly digging a whole into the oil pan however, started puking PS fluid the moment the engine was started which kicked off a rage filled removal of the entire steering system. In retrospect, it would have been much better to keep trying different things instead of being stubborn and forcing this to work but sometimes you have to learn things the hard way.
Steering V2
Once again, I found myself at the junkyard to find parts to make my disaster of a drift car functional. Once again, Lexus seems to have the parts that I need. Is300 steering racks mount to the crossmember from the rear with relatively simple brackets, and do not have any fittings on the top of rack. It is also much wider than the 86 rack and much more beefy. Because the rack was wider, the input shaft of the rack was farther towards the driver side of car when centered than the 86 rack was. With the is300 rack mounted under the car, steering shaft bolted in just fine, I needed to get the tie rods to bolt up. The is300 has a much wider track width though, even with the outer tie rods adjusted all the way in, it was still way to wide to fit. So I extended my control arms. It was still too wide. After a lot of trial and error, I discovered that the inner tie rods will just bolt right into the is300 steering rack. Not only are the 86 tie rods shorter, but the outer tie rods have a ton of adjustments, unlike the small is300 outers. Had I known this from the beginning, I wouldn’t have extended my lower control arms. I’d rather have faster self steering than the hella sick camber that I gave my car but what’s done is done. After making some custom power steering lines, I had finally put something together that felt great to drive. (I did mount it too low, which resulted in one of the rack mounts hitting the ground pretty hard and getting bent out of shape. I ended up remounting it higher, and yes, that was just as much of a pain in the ass as you could imagine it was.)
That is mostly how the car sits. I got to take it to enough drift events to make me feel comfortable in the car and get some cool drifty pics. I still have some complaints about the car, the oil pan is the lowest part of the car and has taken quite a beating, I’m very grateful it has held on this long, and the caster seems to have been greatly effected by the extended lower control arms. But those issues will be pushed to the back burner once again because I crashed the car. Into my friends car. It was a track accident and no bad blood between us. Ultimately, neither of us had any business driving tandems but wanted to have some fun as a send of since I was moving away. Currently I am planning to tube the front end and hoping to upgrade the cooling system to an ls430 aluminum radiator and AC condenser. Having a drift car with AC is truly my wildest dream. Well if you made it this far, I hope you found this useful or at least mildly entertaining. Best of luck on all your own projects!

